Installing Docker
Docker is available in many different flavours, the original Linux container can be run on most platforms, either natively or as an ultra-light VM layer. Initially Docker could only run on Linux but then the docker toolkit was released for the Mac and for Windows. This allowed the Linux containers to run on this ultra-light VM layer. More recently the revised ‘Docker for Mac’ product has been released, this still runs Linux containers but is much improved. It comes with all the optional tools that are available on Linux installed as standard. These include docker compose, Kubernetes orchestrator (as well as Swarm), the Kitematic etc. This is because the Mac version is aimed at developers and not production, but for the purposes of running Acorn related applications the Mac version (or older windows toolkit version) is fine.
Windows has also gone through a revision of the initial docker toolkit. The new version of docker on windows can run Linux containers under Hyper V or it can run the new Windows containers natively. This comes at a cost in that it now requires 64 bit Windows 10 Pro or Windows 2k3 server. Currently windows containers cannot run on other platforms, not even MS Windows running the older Docker Toolkit.
Installing Mac or Windows versions is pretty straight forward. You can go store.docker.com and select you flavour, then download and follow the standard install process for your platform. You generally don’t need to worry about the ‘edge’ version, or switching on experimental features, or even changing the default config, if all you just want to run is containers from an image hub/respository.
For Mac or Win10 64bit go to https://store.docker.com/. You can also download an install for the AWS & Azure Clouds; although many Cloud providers have some sort of Cloud Container Service.
For the older version of Docker that runs on Windows 7 & 8 grab it from here
Linux is a bit more fun as different flavours of Linux have different package management systems. The problem with Linux distros is they do not tend to update major version within a distro’s lifetime. Docker being a fairly new product, in the modern devops world, is fast moving and you could be missing out on many must have features because you Linux version is sticking to the same machine version. The options therefore are to play around with the package repository source to get the latest packages, download from the link above, or use the docker unix/linux install script that can be curled and piped to shell. The script method is generally the easiest way if you use lots of different flavours of unix as this method is the same whether you want to install on a Linux distro that uses yum, apk, aptitude or apt/apt-get. The primary flavours of Linux supported are Fedora, CentOS, Debian and Ubuntu, other flavours of Linux are not supported directly but may work.
The command to install the Linux version via a shell script is:
curl -sSL https://get.docker.com | sh
If you wish to use Docker on the Raspberry Pi you can also use this script, or you can use a Pi Docker distro called Hypriot which is designed for the purpose of running Docker on Raspberry Pi.
Note: It is important that if you install with one method you stick with this method for updates and upgrades, otherwise you may run into issues.
Check Install
One you have installed docker you need to run something. Depending on how you installed docker, and what platform you are on, you may need to do something with root/super user/admin privileges. E.g. add your user to the docker group, use sudo, or do something with windows administrator. The following commands assume that you can run docker with this higher privilege level, if you have not set it up like this you may have extra steps to do, e.g. put sudo in front of a docker command, or use the ‘run as administrator’ option on Windows.
First we need to check that every thing is up and running. Docker is split into several services, but you can just think of it as a client and server system. If you type:
$ docker version
You should see something like this on the Mac.
$ docker version
Client:
 Version:      18.05.0-ce-rc1
 API version:  1.37
 Go version:   go1.9.5
 Git commit:   33f00ce
 Built:        Thu Apr 26 00:58:56 2018
 OS/Arch:      darwin/amd64
 Experimental: false
 Orchestrator: swarm

Server:
 Engine:
  Version:      18.05.0-ce-rc1
  API version:  1.37 (minimum version 1.12)
  Go version:   go1.10.1
  Git commit:   33f00ce
  Built:        Thu Apr 26 01:06:49 2018
  OS/Arch:      linux/amd64
  Experimental: false
As mentioned before the Mac runs an ultra light VM to run the containers, so the client is ‘Darwin’ but the server is ‘Linux’. But both client and server actually run on the same physical Mac. On a Linux system you will see ‘Linux’ in the client OS. On a Raspberry Pi you would see ‘arm’ for the Architecture:
$ docker version
Client:
 Version:	18.04.0-ce
 API version:	1.37
 Go version:	go1.9.4
 Git commit:	3d479c0
 Built:	Tue Apr 10 18:25:24 2018
 OS/Arch:	linux/arm
 Experimental:	false
 Orchestrator:	swarm

Server:
 Engine:
  Version:	18.04.0-ce
  API version:	1.37 (minimum version 1.12)
  Go version:	go1.9.4
  Git commit:	3d479c0
  Built:	Tue Apr 10 18:21:25 2018
  OS/Arch:	linux/arm
  Experimental:	false
If the docker server is not running you will see an error when you do the version command. This will look like:
  $ docker version
  Client:
   Version:      18.05.0-ce-rc1
   API version:  1.37
   Go version:   go1.9.5
   Git commit:   33f00ce
   Built:        Thu Apr 26 00:58:56 2018
   OS/Arch:      darwin/amd64
   Experimental: false
   Orchestrator: swarm
  Error response from daemon: Bad response from Docker engine
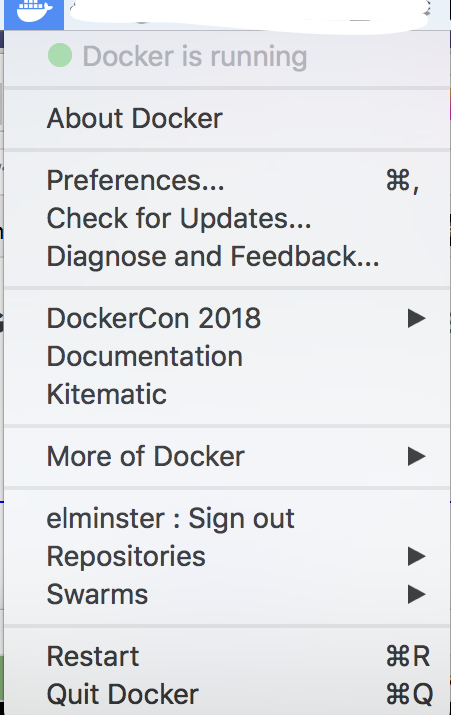
Check you have started the service. On Mac check to see if the docker icon is in the menu bar. If not then start Docker by double clicking icon, if it is running then check you see a green status circle. Windows is similar to Mac except the icon will be in the taskbar. On Linux use systemctl (or equivalent) to check the docker daemon is running.
$ systemctl status docker
● docker.service - Docker Application Container Engine
   Loaded: loaded (/lib/systemd/system/docker.service; enabled; vendor preset: enabled)
   Active: active (running) since Fri 2018-04-27 14:36:37 BST; 1 weeks 4 days ago
     Docs: https://docs.docker.com
 Main PID: 591 (dockerd)
      CPU: 3h 41min 8.318s
   CGroup: /system.slice/docker.service
           ├─591 /usr/bin/dockerd -H fd://
           └─622 docker-containerd --config /var/run/docker/containerd/containerd.toml
Running a Container
Now we have everything installed and the services running we actually need to start some containers. Containers are created from images in the docker hub (by default, you can get image elsewhere if you wish). You can explicitly download them, but there is no need to, when docker goes to run a container and finds them [the images] not stored locally it will automatically download them.
Run the following command to start a B2 Emulator container
$ docker run -d -p 5920:5920 -v $(pwd):/home/bbcmicro/ssd --name b2 elminster/b2
You will notice several different elements make up the command. These are:
	1. run
	2. -d
	3. -p 5920:5920
	4. -v $(pwd):/home/bbcmicro/ssd
	5. --name b2
	6. elminster/b2
Element (1) is the run command, this simply tells docker to spin up a new container based on the image provided in (6), rather than start an existing one. The ‘-d’ in (2) tells docker to run the container as a background processes.
The third element is the ‘-p’ flag, this says 5920:5920. This tells Docker to map port 5920 (right part of ‘:’ ) on the container to port 5920 (left part of ‘:’ ) on the local host. It might seem silly to map the port to the same port, but if you do not use this flag then the port will be blocked from the host. I.e. you wont be able to connect to your container, a virtual firewall.
We will skip volumes and go into more depth of these below. The ‘–name’ parameter allows you to name the container as a sensible name, otherwise you will end up with a random system generated container name, as we saw in the examples above. By having a sensible name it makes identification of a container, starting and stoping it, etc., much easier.
The final part is the image name. The part before the ‘/’ is the repository name, this will default to a repository of that name on hub.docker.com unless you tell it otherwise, the part after the ‘/’ is the image name, i.e. the application. An optional ‘:’ after the name is the tag, this is usually used for the version details.
When docker tries to instantiate a container based on this image and finds it is not available locally it knows it needs to download the ‘latest’ version of application from the repository on hub.docker.com. ‘Latest’ is the default tag if none is specified after the colon. But this is an arbitrary tag and the ‘latest’ may not actually be the latest image. For example the ‘latest’ ubuntu image actually downloads an ubuntu 16.10 image, but 17.10 and 18.04 are also available as images. So to download those you would need to say ubuntu:17.10 (note that there is no repository name, this is because some applications are special and reside at the top level of hub.docker.com).
**Volumes**
The forth part of the command is the ‘-v’ parameters. You can have 0 to many of these, they specify the storage volumes. Usually the file systems for a container is contained logically within the container. If you delete that container all the storage associated with it may also vanish (depending on a number of things, covered later in the article). You may not want this to happen, or you may wish to reuse a volume or files. In Docker there are two ways to do this, both of which use the ‘-v’ flag. These are:
- Named Volumes
- Bind Mounts
The above Acorn emulator command example uses a bind mount. But you can also use a Docker named volume, this creates, as the title suggests, a volume with a sensible name. This is presented to the container to be used for storage, it behaves to all intensive purposes as standard container storage and can be viewed with the Docker volume command below. A standard default container volume will have a system generated name, which is a very long string of alphanumerics, this is hard to work out what the volume was used for. The command to display the system generated or named volume is:
$ docker volume ls
If you created a named volume you will see this in the ‘volume ls’ command, unlike the other volumes which will have obscure system generated name. The nice thing about named volumes is if you remove the running container and then start a new container, you can use the same named volume, This ensures you will have a container in the same state as the previous one, because you reused the store data. Some containers store no data, in which case there is no requirement to reuse or have persistent data. If you never need to change any config and save the setting this is feasible for the Acorn 8bit emulators, in which case you can just use the bind mount to view your saved files.
As we have show an example of an emulator with a bind mount above, lets show some storage examples for named and system generated volumes.
No Persistent/Named Storage
First we look to see what local volumes we have, if it is a fresh install there should be none.
docker@ubuntu:~$ docker volume ls
DRIVER              VOLUME NAME
Now we run a postgres container as a background process, this will not find the image to create the required container locally, so it will download the image from the default Docker Hub (aka image repository)
docker@ubuntu:~$ docker run -d postgres
Unable to find image 'postgres:latest' locally
latest: Pulling from library/postgres
...
Digest: sha256:bcb7180d70bacbea299d51a3dbcb4d2804a0b529cf5e27f75bdf40ffef9272d9
Status: Downloaded newer image for postgres:latest
4ecce12af0a3d9adb0cac71c7a92a966ff49528580c1e1f1c207b64e892178a6
Now we can check we have a running container, notice the system generated name ‘optimistic_lovelace’ as we didn’t use the ‘–name’ parameter.
docker@ubuntu:~$ docker container ls
CONTAINER ID        IMAGE               COMMAND                  CREATED             STATUS              PORTS               NAMES
4ecce12af0a3        postgres            "docker-entrypoint.s…"   49 seconds ago      Up 48 seconds       5432/tcp            optimistic_lovelace
Next we can check the volumes again, and we see we have a volume, with a long complex volume name identifier.
docker@ubuntu:~$ docker volume ls
DRIVER              VOLUME NAME
local               617cd85d6fca9a996db0f021fde5c343c744004cc45205c043ef3641a90977c6
If we now stop the running container and do an ‘ls’ again, we will see it has gone.
docker@ubuntu:~$ docker stop optimistic_lovelace
optimistic_lovelace

docker@ubuntu:~$ docker container ls
CONTAINER ID        IMAGE               COMMAND             CREATED             STATUS              PORTS               NAMES
But we didn’t explicitly remove it or use the ‘-rm’ flag in the run command, so the container is still there in a stopped state, we need to use the ‘-a’ flag to see it.
docker@ubuntu:~$ docker container ls -a
CONTAINER ID        IMAGE               COMMAND                  CREATED              STATUS                      PORTS               NAMES
4ecce12af0a3        postgres            "docker-entrypoint.s…"   About a minute ago   Exited (0) 10 seconds ago                       optimistic_lovelace
Lets now explicitly remove the container. Notice that the volume remains. If we had implicitly remove the container by using the ‘-rm’ flag in the run command this would have also removed the volume when we stopped the container. Whereas a named volume will not be remove even if you use ‘-rm’ in the run command
docker@ubuntu:~$ docker rm optimistic_lovelace
optimistic_lovelace

docker@ubuntu:~$ docker volume ls
DRIVER              VOLUME NAME
local               617cd85d6fca9a996db0f021fde5c343c744004cc45205c043ef3641a90977c6
Now we have removed the container using ‘-a’ with ‘ls’ when we list containers will show nothing.
docker@ubuntu:~$ docker container ls -a
CONTAINER ID        IMAGE               COMMAND                  CREATED             STATUS                     PORTS               NAMES
Now lets start a new container, without removing the previous volume
docker@ubuntu:~$ docker run -d postgres
7a5f3b91d65705046ad30771d4b0f7c1ec7fc68365a5c6d0d3a63cd22e5f7a47
Notice that rather than reuse the volume the new container will create a new volume, effectively losing any data from the previous container. So we now have two volumes but only one container.
docker@ubuntu:~$ docker volume ls
DRIVER              VOLUME NAME
local               5ab182148ac8ffc78bd8b9a61d92cf565add31ed59a8bcbc008a9af71070db04
local               617cd85d6fca9a996db0f021fde5c343c744004cc45205c043ef3641a90977c6
You could explicitly remove the old volume, or you can use the prune command which will get rid of any volume not used by a container, although be warned this will also get rid of named volumes, which we will create in the next section.
docker@ubuntu:~$ docker volume prune
WARNING! This will remove all local volumes not used by at least one container.
Are you sure you want to continue? [y/N] y
Deleted Volumes:
617cd85d6fca9a996db0f021fde5c343c744004cc45205c043ef3641a90977c6

Total reclaimed space: 40.53MB
Now we just have the volume from the running container.
docker@ubuntu:~$ docker volume ls
DRIVER              VOLUME NAME
local               5ab182148ac8ffc78bd8b9a61d92cf565add31ed59a8bcbc008a9af71070db04
With Persistent/Named Storage
Now we will look at persistent storage using named volumes, there are much easier to understand than 60 character long random character system generated volume names, and give a clue as to their purpose. We will use postgres again in this example but the same applies to any application, including the Acorn emulators. First we will manually create the volume and check it exists.
docker@ubuntu:~$ docker volume create pgdata
pgdata

docker@ubuntu:~$ docker volume ls
DRIVER              VOLUME NAME
local               pgdata
Now we will spin-up a postgres container but this time we will use the ‘-v’ parameter to indicate we wish to overide the standard volume config. The left part of the string before the ‘:’ is the volume we just created. The right part is the place to map it to inside the postgres container.
docker@ubuntu:~$ docker run -d --rm -v pgdata:/var/lib/postgresql/data postgres
45599121d3be3d29ae9a2e6705a07cccad1c81566ed557d2f5df71f2094425a9
If we do a ‘volume ls’ again we will see that no extra volumes have been created when we started the container.
docker@ubuntu:~$ docker volume ls
DRIVER              VOLUME NAME
local               pgdata
We also see we now have a container called ‘naught_brahmagupta’ running.
docker@ubuntu:~$ docker container ls
CONTAINER ID        IMAGE               COMMAND                  CREATED             STATUS              PORTS               NAMES
45599121d3be        postgres            "docker-entrypoint.s…"   14 seconds ago      Up 13 seconds       5432/tcp            naughty_brahmagupta
When we stop the container this time it will automatically be removed. As mentioned above if this was a system generate default volume the volume would also be removed.
docker@ubuntu:~$ docker container stop naughty_brahmagupta
naughty_brahmagupta
But if we check we see the volume is still here, as mentioned before a named volume will not be removed with the ‘-rm’ flag.
docker@ubuntu:~$ docker volume ls
DRIVER              VOLUME NAME
local               pgdata
We will start another postgres container with the same parameters.
docker@ubuntu:~$ docker run -d --rm -v pgdata:/var/lib/postgresql/data postgres
9d1fe310e43d78f6b276c280b263799519797562bd36f1568fa24b0a4d5d3233
And again we see it has picked up the existing container rather than create a new one.
docker@ubuntu:~$ docker volume ls
DRIVER              VOLUME NAME
local               pgdata
This time we stop the container with its id, you only need to type in enough id to be unique (or as must as you like there after)
docker@ubuntu:~$ docker container stop 9d1
9d1
We see that the container is not only stopped, but also gone.
docker@ubuntu:~$ docker container ls -a
CONTAINER ID        IMAGE               COMMAND             CREATED             STATUS              PORTS               NAMES
But again we check and the named volume is still there.
docker@ubuntu:~$ docker volume ls
DRIVER              VOLUME NAME
local               pgdata
As mentioned above a volume prune will still remove a named volume if no stopped or running containers are using that volume.
docker@ubuntu:~$ docker volume prune
WARNING! This will remove all local volumes not used by at least one container.
Are you sure you want to continue? [y/N] y
Deleted Volumes:
pgdata

Total reclaimed space: 40.53MB
We now see the volume has been pruned, even though it was a named volume, something to remember so you don’t accidentally lose data.
 docker@ubuntu:~$ docker volume ls
    DRIVER              VOLUME NAME
Bind Mounts
The other type of volume, a bind mount, mounts a host filesystem directly into the container. We saw this in the Acorn emulator example at the start of the article. This is similar to what can be done with VMWare Workstation, Citrix, RDP/RDS, i.e. a local drive is mounted into a VM or remote server. This allows you to save and load files from you host computer to the target VM or Remote Desktop, this works in effectively the same way for containers. In this case when the container is removed nothing will touch the storage on the host filesystem, so this is another form of persistent storage.
In the context of Acorn Emulators you will probably want to mount a local host file system containing all your ssd/dsd Acorn disks into your container running the emulator, you can then load and run all of these disks on the emulators. You could have all the disks as part of the default image, and therefore part of the containers, but if you had 8 or 9 emulators you would potentially have quite a lot of duplication. In addition every time you added a new ssd you would have to add it to every image and container, this would get tedious very quickly unless you have an automated build/management system.
Control and Access
Optionally (in addition to a whole raft of parameters and switches) you can add —rm to the command line. This means that when the container stops, either because you explicitly stop it, it crashes or the container naturally finishes (i.e. you click exit on the BBC emulator), it will be removed. Otherwise it will still exist in a stopped state. This is okay if you decide to restart the same container each time, but if you try and create one with the same name it will error. Or if you are letting docker generate the names then you will create container after container, eating up lots of space.
To explain this a bit better. Start a container with the run commands above.
$ docker container ls
This shows the container running. And now stop it.
$ docker container stop <containers name>
Now if you do an ‘ls’ you won’t see the container as it is no longer running. But if you try to do the run command again (with an explicit ‘–name’ the same as before) you will get an error. Now run
$ docker container ls -a
You will now see the container in a stopped mode. You could start a container with a different name, but as mentioned above you have now doubled the space used. You can remove the original container, and use the run command to create a new one (this is what using the —rm command does, it condenses two commands into one). Or you can use the start command to restart the stopped container. You do this with the command:
$ docker container start <containers name>
The main disadvantage of using the start method is you always keep the same container, so if a new image is pushed to docker hub this will not be used. At least until such time that you create a new container, when it will then try to use the latest image (ie. download the new one).
Once you have the container with an image of an Acorn emulator running, and you have mapped a drive with loads of ssds, you are readying to run some games. There are two main issues to overcome, namely the display and sound. Currently the display is done via VNC, the containers displays the emulator on a VNC display. The user (you) then starts a VNC client and connects to the VNC server. If you remember this is what the ‘-p’ 5920:5920 bit was all about. Docker will map the port (by default) to the host main IP address. So if your IP address of you PC was 10.10.10.10 to connect to the emulator with defaults you would enter in VNC client the address 10.10.10.10:5920.
You will then be asked for a password, this is currently hardcoded as ‘TestVNC’, this maybe be parameterised at some point in the future. You should now be logged in and viewing the familiar emulator screen. While sound is possible when using VNC it is a little trickier and currently not implemented. There are VNC images for Docker that implement sound but these are quite big (about 5 times bigger than the current images, this makes the images a little unwieldy, and is something that can be looked at in the future).
When you have finished using the emulator you have two choices to exit. Choose the ‘exit’ option from the emulator’s menu, or close the VNC window directly. The former will exit the emulator application and cause the container to exit and shutdown. The latter will just kill the VNC client and not effect the application’s container in anyway. If you exit VNC in this way, and then want to shutdown the application without logging in via VNC anymore you can use the docker ‘stop’ command mentioned earlier.
Either way unless you used the ‘—rm’ parameter when you started the container it will still exist, but it will now be in a shutdown state. You then have the options for removing or restarting it that were mentioned above. Note there are various commands to sort out how containers react when docker start-up or when containers crash etc. These are beyond the scope of this post, more details can be found in the Docker documentation.
Summary
In summary use the following to start, connect and stop an emulator container.
Docker start
bind mount:
$ docker run -d -p 5920:5920 -v $(pwd):/home/bbcmicro/ssd --name b2 elminster/b2
or named volume:
$ docker run -d -p 5920:5920 -v my_ssds:/home/bbcmicro/ssd --name b2 elminster/b2
Exit VNC & docker stop
‘$ docker container stop <container name/id>’
Or emulator exit menu option
Keep, or remove container as required.
‘$ docker container rm <container name/id>’
End of part 2. In part 3 we will cover the various containers available and other useful commands.
References:
https://docs.docker.com/storage/volumes
https://docs.docker.com/engine/reference/run
https://blog.hypriot.com/downloads
https://store.docker.com/